Recently my friend, and Van Slyke cousin, Thomas MacEntee shared a link to an article he wrote called 11 Ninja Tips to Declutter Your Email Inbox
I spent some time reading through it last night and found it very helpful! I don't know about you but I have thousands of unread emails in my two main email addresses.
When will I ever find time to read or delete them? Every so often I go on a blitz and start deleting like mad. But that only weeds the numbers down a little.
The tip I most took to heart was to unsubscribe from a lot of mail I signed up for. I don't mean genealogy newsletters or anything genealogy related but why do I need to see all the "super hot deals" flying in to my mail box from Wayfair, E-bay, Western Digital, i-Robot.... I'm sure you get what I mean! So this morning I spent an hour unsubscribing from most of those. If I want to know what's special, I'll visit the website!
Thanks to Thomas I might just get this under control. Wish me luck!
Showing posts with label Organization. Show all posts
January 23, 2019
January 3, 2018
Organizing Your Genealogy Files
It's another year, another opportunity to create some kind of organization out of our genealogy files and notes. Yes, I said "our" because I'm pretty sure that most of you are in the same mess I'm in. I'm super organized in the kitchen. Spices are all in alphabetical order. Dishes and glassware are neatly placed by type and pattern. Cereal is in the cupboard in alphabetical order. You get the picture, right?But my genealogy files? They're a mess, although I prefer to think of them as in a state of "organized chaos". I have had stacks of papers and documents so high they defied gravity. Oddly enough I'm very organized and methodical with the research I do on my New Netherland Settlers project and any genealogy that is not about my own ancestors!
One of the reasons I'm in a
Over the years I've tried binders, filing cabinets, digital files instead of paper, storage tubs.... you name it, I've probably tried it. Of course within each method there is even more choice. For example when you use binders, you can file by surname, by family group, by location, by type of record, by individual.
I loved binders when I used them. I printed off family group sheets and filed all relevant documents and photos with the appropriate family. It was a great system for me until I had so many files filling dozens of binders and it became cumbersome. That's what happens the longer you look for, and find, ancestors.
Filing cabinets worked well for me until again, I found so many ancestors that my notes and documents filled so many cabinets they could not fit in my small office. Soon we had huge filing cabinets in my office, in the basement, and in our family room.
I'm even worse at organizing digital files. It's boring. It's tedious. I do use Evernote to help me with organizing those genealogy files but I still don't enjoy doing it.
I liked using storage tubs because I could just label each tub and toss the documents in without worrying about chronological order or sorting by location or whatever method might be best. Of course that didn't work well after awhile because I could never find what I wanted and I never got around to organizing the papers in each tub.
![]() |
| One of my family books |
Each chapter contains documents (and a family group sheet) for the next generation down. I also add research I've done on siblings in each generation. The book ends wherever the surname daughters out for my direct line. This has been really fun and my children are enjoying them.
I'm ensuring that my research is not lost but the drawback is that I can't include every single fact and document. I didn't think it would solve my problem of organizing my papers but I was wrong! I've gone back to using filing cabinets for my research notes and papers, and when I create a book, I am forced to organize those documents before I begin writing.
My husband also came up with the idea of selling these family surname books. Much to my surprise other descendants have purchased them! So it's a win-win situation. My genealogy gets organized, my children have individual books on our family surnames and ancestors, and other descendants can read about their ancestors.
How do you solve the problem of organizing your genealogy files?
December 29, 2015
Easy Steps to Organizing, Scanning, Preserving & Sharing Family Photos
In November and December of this year I wrote a 4 part series of articles for Legacy Family Tree on Organizing, Scanning, Preserving and Sharing Family Photos. They may be helpful for any of my readers wanting to create some structure and organization out of a mess of family photographs! I've followed my own advice and made giant leaps in my own chaos of shoeboxes of stored family photos and old photo albums tucked into corners of the attic.
In "10 Easy Steps to Organizing Family Photos" Part I and Part II I will walk you step by step through easy ways to sort your family photographs and get them ready for scanning. Graphics such as the one I created below add a visual component to aid in following the steps.
In "10 Steps to Scanning, Preserving and Sharing Your Photos" Part 1 and Part 2 I explain resolution, file format, types of scanners and other details you need to know before you begin to scan those treasured photographs.
One of the first steps is deciding on a file structure on your computer. Screenshots of my own directory setup should help in following my suggestions
You've probably heard of meta data but might not know what it is. That is all explained in my series and screenshots of using meta data will be helpful.
So don't wait - take a bit of time before the New Year and add organizing and scanning your family photographs to your 2016 New Year's Resolutions
May 18, 2015
Organizational Project Part 6: Ready for the Second Sort of Photographs!
In January I began my plan to sort, organize and digitize my family photos. I ended up ordering archival boxes and sleeves from a company called GetSmartProducts
I've
previously shared how I am organizing, sorting and purging these photos
and if you missed those earlier posts, you can view them by clicking on
the lable "Organization Project" at the bottom of this post or in the
right side bar.
| Pre-marriage photo box - childhood & young adult |
I now have 5 purple acid-free boxes with family photos categorized which cover my life: pre-marriage; marriage #1; marriage #2; marriage #3; grandchildren.
I have other boxes for other general categories but for now I'm focusing on these 5 purple boxes. My next step is to take one box and do my second sort within those photographs. I plan on putting the photos into a semi-chronological order, which should make finding duplicates easier. This should also ensure that photos of special events such as birthday parties, vacations and other occasions end up together.
Next I will remove duplicates and place them in boxes intended for each of my children. If there are duplicates that I think my nieces, nephews, cousins or other family members would like, I will put those into envelopes to be mailed to them.
Once I've completed this sort (the second sort), I could either begin scanning these photos or I can leave them and start on Box #2. I have decided I will finish the second sort on these 5 purple boxes before starting to scan.
Here are links to the previous blog posts about this project:
March 25, 2015
Using Evernote for Genealogy
While it is not genealogy-specific the author has some intriguing ideas that might be useful to researchers.
Of course if you are just getting started with Evernote, or considering using it, you might want to grab a copy of the e-book I wrote called "Organize Your Genealogy in Evernote in 10 Easy Steps"
The book costs less than a cup of coffee and is easy to follow with lots of screenshots.
March 24, 2015
Organizational Project Part 5: The Domino Effect in an Organization Project
In January I began my plan to sort, organize and digitize my family photos. I ended up ordering archival boxes and sleeves from a company called GetSmartProducts
I've previously shared how I am organizing, sorting and purging these photos and if you missed those earlier posts, you can view them by clicking on the lable "Organization Project" at the bottom of this post or in the right side bar.
If you're also organizing I am willing to bet you have run into what I call "The Domino Effect". That's when you realize that in order to sort items "A" you have to make room somewhere in your house to store them, and that means rearranging/organizing a closet in Room "B". But the closet is full so you have to make room for those items (after you sort and purge of course!) somewhere else - perhaps in cupboard or closet "C" but closet "C" is also full.... and on and on it goes.
That happened to us yesterday. My husband needed more room for a project he is working on so I agreed to give up a small room in the basement that we use for binding my coil-bound books and doing lookups on microfiche.
That meant the unbound books and the equipment (binding machine, laminator etc) had to be stored elsewhere and it had to be somewhere easily accessible. Okay my office in our loft would do nicely....IF I made some room on the big table for the equipment, and room in the closet for the unbound books.
Making room on the table meant sorting, organizing, purging and filing 3 large cardboard boxes of miscellaneous papers - business papers, personal papers, genealogy papers - it was all a big mess of unsorted "stuff".
Because I really didn't want to start on that task, I made a decision that was unusual for me. I would be ruthless. Any old scraps of paper that I scribbled on with vague references or notes, would be tossed in the garbage. Any old research would be likewise dumped in the trash. I would only keep documents (business, personal and genealogy) that absolutely needed to be kept. That's not easy for me. I have good intentions - one day I will read through all the notes I made in 2002 and see what, if anything, needs to go into my files. But I realize that now, at this stage of my life, it is unlikely I will ever get to that. So --- decision made, no turning back and I began sorting.
After 3 hours I had a garbage bag full of papers that my husband will dump into our burning barrel and destroy. The bag weighs over 25 pounds. I tossed old fan-fold genealogy (and you know how old that must have been). I found, and discarded, an old leather wallet that had sentimental value. I even found unopened mail from 2012!
And so the project continues. My husband has removed all his "junk" from my office credenza (yes he kind of took over my lovely office in our loft) which provides room for all the unbound books and the ones he is busy binding today.
The large table is ready for the bookbinding equipment. As difficult (and scary) as it was for me to throw out all those papers, it feels really good to have done so!
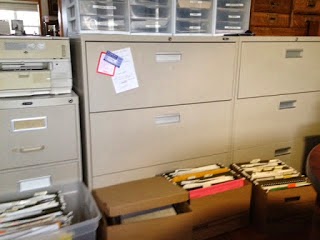
My hoarding tendencies have to be overcome at times. I hate throwing out paper because maybe, just maybe, I will need it one day.... but after yesterday I feel I'm on the right track and can't wait to get at my 3 drawer lateral filing cabinet that is crammed full of genealogy papers!
| My Alcove for Binding Books |
If you're also organizing I am willing to bet you have run into what I call "The Domino Effect". That's when you realize that in order to sort items "A" you have to make room somewhere in your house to store them, and that means rearranging/organizing a closet in Room "B". But the closet is full so you have to make room for those items (after you sort and purge of course!) somewhere else - perhaps in cupboard or closet "C" but closet "C" is also full.... and on and on it goes.
That happened to us yesterday. My husband needed more room for a project he is working on so I agreed to give up a small room in the basement that we use for binding my coil-bound books and doing lookups on microfiche.
That meant the unbound books and the equipment (binding machine, laminator etc) had to be stored elsewhere and it had to be somewhere easily accessible. Okay my office in our loft would do nicely....IF I made some room on the big table for the equipment, and room in the closet for the unbound books.
Making room on the table meant sorting, organizing, purging and filing 3 large cardboard boxes of miscellaneous papers - business papers, personal papers, genealogy papers - it was all a big mess of unsorted "stuff".
Because I really didn't want to start on that task, I made a decision that was unusual for me. I would be ruthless. Any old scraps of paper that I scribbled on with vague references or notes, would be tossed in the garbage. Any old research would be likewise dumped in the trash. I would only keep documents (business, personal and genealogy) that absolutely needed to be kept. That's not easy for me. I have good intentions - one day I will read through all the notes I made in 2002 and see what, if anything, needs to go into my files. But I realize that now, at this stage of my life, it is unlikely I will ever get to that. So --- decision made, no turning back and I began sorting.
After 3 hours I had a garbage bag full of papers that my husband will dump into our burning barrel and destroy. The bag weighs over 25 pounds. I tossed old fan-fold genealogy (and you know how old that must have been). I found, and discarded, an old leather wallet that had sentimental value. I even found unopened mail from 2012!
And so the project continues. My husband has removed all his "junk" from my office credenza (yes he kind of took over my lovely office in our loft) which provides room for all the unbound books and the ones he is busy binding today.
The large table is ready for the bookbinding equipment. As difficult (and scary) as it was for me to throw out all those papers, it feels really good to have done so!
My hoarding tendencies have to be overcome at times. I hate throwing out paper because maybe, just maybe, I will need it one day.... but after yesterday I feel I'm on the right track and can't wait to get at my 3 drawer lateral filing cabinet that is crammed full of genealogy papers!
Here are links to the previous blog posts about this project:
Organizational Project Part 2 - Family Diaries
Organization Project Part 3 - Digitizing Family Slides
Organizational Project Part 4 - Sorting the Family Photographs
March 10, 2015
Organizational Project Part 4 - Sorting the Family Photographs
In January I began my plan to sort, organize and digitize my family photos. I ended up ordering archival boxes and sleeves from a company called GetSmartProducts
The acid-free boxes and sleeves finally arrived last week! I agonized over how to begin and how to sort the hundreds of family photographs. Should I sort by topic such as "Trip to Mexico", "Wedding"? Or should I sort by decade? Perhaps I should sort by individuals - one box for each of my children, one for grandchildren?
My husband thought I should simply sort into 3 piles - Keep, Throw Out and Undecided. That doesn't work for me but if it works for you, use it!
Eventually I decided that I would start sorting the same way I use online search engines - in broad categories first, then refining the sort bit by bit.
Since I have been married three times (Divorce, death and current), it was easy to sort the photos into those different times of my life. I took 3 purple boxes and made a temporary label with the surname of each husband. I labelled a 4th box "pre-marriage". So I had 4 boxes that pretty much covered my entire life to the present day.
Having lots of older family photographs too I needed to label more boxes - one for my mother and her family before marriage and one for another family surname. Then I began my sort.
As I opened each box of miscellaneous photos, I quickly sorted keeping 3 objectives in mind:
1. Purge (garbage photos, blurry photos, photos of people I didn't know, etc)
2. Give to other family members
3. Put into my labelled acid-free boxes
It was amazing how quickly this job went! Keeping my box categories so broad was a huge help. I wasn't worried about who was in the photo, where it was taken, did I have multiple copies, etc. I was able to glance at a photo and determine fairly quickly what "era" it was - Marriage #1, #2 or #3
I'm not done but I'm 3/4 of the way through the first general sort. It's going to be fun to refine my sorting, one box at a time - that's going to be next.
I also had one larger acid-free box for 5x7 photos and 1 acid-free box for anything bigger than 5x7. The one thing I am going to add is one more box for my grandchildren' s photos. I'll share my sorting strategies for refining my first general sort in my next blog post.
| On a roll with my first general sort of the family photos! |
My husband thought I should simply sort into 3 piles - Keep, Throw Out and Undecided. That doesn't work for me but if it works for you, use it!
Eventually I decided that I would start sorting the same way I use online search engines - in broad categories first, then refining the sort bit by bit.
Since I have been married three times (Divorce, death and current), it was easy to sort the photos into those different times of my life. I took 3 purple boxes and made a temporary label with the surname of each husband. I labelled a 4th box "pre-marriage". So I had 4 boxes that pretty much covered my entire life to the present day.
| Purge Pile |
As I opened each box of miscellaneous photos, I quickly sorted keeping 3 objectives in mind:
1. Purge (garbage photos, blurry photos, photos of people I didn't know, etc)
2. Give to other family members
3. Put into my labelled acid-free boxes
It was amazing how quickly this job went! Keeping my box categories so broad was a huge help. I wasn't worried about who was in the photo, where it was taken, did I have multiple copies, etc. I was able to glance at a photo and determine fairly quickly what "era" it was - Marriage #1, #2 or #3
I'm not done but I'm 3/4 of the way through the first general sort. It's going to be fun to refine my sorting, one box at a time - that's going to be next.
I also had one larger acid-free box for 5x7 photos and 1 acid-free box for anything bigger than 5x7. The one thing I am going to add is one more box for my grandchildren' s photos. I'll share my sorting strategies for refining my first general sort in my next blog post.
Here are links to the previous blog posts about this project:
Organizational Project Part 2 - Family Diaries
Organization Project Part 3 - Digitizing Family Slides
January 31, 2015
Organization Project Part 3 - Digitizing Family Slides
Since I am still waiting for my archival boxes and sleeves to start organizing my hundreds of family photos, I decided to go ahead and start on my family slides. Remember when slides were the rage? That was back in the 60s, 70s and even into the 80s, then their popularity died out.
I don't know about you but I have hundreds of slides and it's time I did something with them. The longer they are left the more they deteriorate. Besides who has a slide viewer anymore? One problem is that my slides are not organized by event, date or any other criteria. You can see from my photo that some are in slide boxes and others are just loose.
To start my organization I bought a nifty little piece of equipment - the Jumbl Scanner & Digitizer. It scans slides and negatives and digitizes them to a memory card or the Jumbl internal memory. You can use an external power source or you can plug it into your computer via USB and use your computer power. It's on sale right now on Amazon. I am loving mine! It's easy and fast. If you want to grab one just use the link below.

Jumbl High-Resolution 22MP Scanner/Digitizer
- Converts 35mm Negatives & Slides to 22-Megapixel Digital JPEGs Using Built-In Software Interpolation - No Computer/Software Required to Operate - Features 2.4" Color LCD & TV Out
To begin my organization and preservation of my slides I decided my first step was to scan them all and organize the digital files later.
The box on the right of this photo are the slides I have scanned in the last 3 days. I only work for an hour at a time as the repetitive motion of inserting and removing the slides is hard on my bad shoulder due to a rotator cuff problem.
Once scanned and saved to a memory disc I insert the disc into my computer and transfer the scans to Picasa. Then I rename them, make any adjustments in contrast that I want, crop any dark edges (this only happens when I don't insert the slide accurately), and rotate them if they are sideways or upside down. Jumbl has editing capabilities but I prefer to use Picasa.
A few of the slides were noticeably backwards (spotted due to backwards writing on signs) so I flip those horizontally using a program called Gimp. You can use almost any graphic program to do this but I work on a Mac and have my favourites that I am used to.
It's a good idea to work out your naming system for the scanned slides before you start renaming them. I like to name mine as Surname_FirstName_Year_Event.
I also add names of other individuals either in the file name if not too lengthy or in the Comments section of the Information part of the photo.
The photo on the right shows my digitized scanned slide of me playing guitar in 1971. I tagged the image with my maiden name and added some detail in the Comment setion. I didn't put my maiden name in the file name as it changed with marriage, so I prefer to just use my first name in this case. For those who might notice the Description "My beautiful picture", my husband put that!
I'm very pleased with the quality of the scans. I uploaded some to my Facebook page and my family seems very pleased to see photos of themselves or deceased loved ones from the 60s and 70s.
Don't wait to start saving your treasured family slides.
I don't know about you but I have hundreds of slides and it's time I did something with them. The longer they are left the more they deteriorate. Besides who has a slide viewer anymore? One problem is that my slides are not organized by event, date or any other criteria. You can see from my photo that some are in slide boxes and others are just loose.
To start my organization I bought a nifty little piece of equipment - the Jumbl Scanner & Digitizer. It scans slides and negatives and digitizes them to a memory card or the Jumbl internal memory. You can use an external power source or you can plug it into your computer via USB and use your computer power. It's on sale right now on Amazon. I am loving mine! It's easy and fast. If you want to grab one just use the link below.
- Converts 35mm Negatives & Slides to 22-Megapixel Digital JPEGs Using Built-In Software Interpolation - No Computer/Software Required to Operate - Features 2.4" Color LCD & TV Out
To begin my organization and preservation of my slides I decided my first step was to scan them all and organize the digital files later.
The box on the right of this photo are the slides I have scanned in the last 3 days. I only work for an hour at a time as the repetitive motion of inserting and removing the slides is hard on my bad shoulder due to a rotator cuff problem.
Once scanned and saved to a memory disc I insert the disc into my computer and transfer the scans to Picasa. Then I rename them, make any adjustments in contrast that I want, crop any dark edges (this only happens when I don't insert the slide accurately), and rotate them if they are sideways or upside down. Jumbl has editing capabilities but I prefer to use Picasa.
A few of the slides were noticeably backwards (spotted due to backwards writing on signs) so I flip those horizontally using a program called Gimp. You can use almost any graphic program to do this but I work on a Mac and have my favourites that I am used to.
It's a good idea to work out your naming system for the scanned slides before you start renaming them. I like to name mine as Surname_FirstName_Year_Event.
I also add names of other individuals either in the file name if not too lengthy or in the Comments section of the Information part of the photo.
The photo on the right shows my digitized scanned slide of me playing guitar in 1971. I tagged the image with my maiden name and added some detail in the Comment setion. I didn't put my maiden name in the file name as it changed with marriage, so I prefer to just use my first name in this case. For those who might notice the Description "My beautiful picture", my husband put that!
I'm very pleased with the quality of the scans. I uploaded some to my Facebook page and my family seems very pleased to see photos of themselves or deceased loved ones from the 60s and 70s.
Don't wait to start saving your treasured family slides.
Here are links to the previous blog posts about this project:
Organizational Project Part 2 - Family Diaries
January 16, 2015
Organizational Project Part 2 - Family Diaries
A few days ago I began my plan to sort, organize and digitize my family photos. I ended up ordering archival boxes and sleeves from a company called GetSmartProducts. A friend in Colorado used them and was satisified and since it is difficult to find an online company that will ship such items to Canada, I took the leap.
Although the items will be some time reaching me, I was impressed when the company phoned me to say they were out of stock on some items. I had a choice - they would ship as the items were available, or hold until they could send as one shipment.
Since it looks like it will be 4 to 6 weeks before my items arrive, I went on to my next organizational project which was sorting my mother's trip diaries, scanning them and sharing them with other family members.
Let me explain first that my mother began going on small trips the year she retired at age 55. She always was an adventurer. At age 65 she took flying lessons, and built an ultra-light with her partner. Then just before her 80th birthday she decided she was going to embark on some adventures. Her first big trip was to Australia where she backpacked around with only a small Barbie Doll backpack she picked up at a local Wal-Mart store in Canada.
I compiled, as best I could, a list of her various trips and the years she took them. She usually travelled alone as she preferred not having to consult with anyone else about what to see and do each day. In her years of travel (her last trip was in 2001 at the age of 85) she visited many countries. I would not be surprised if the list below has some trips missing. She often impulsively took what she called "little trips" without telling any of her children!
Next I created "cover" sheets which gave the date and the name of the trip. Mother had also typed up notes (not the same as her diary entries) and these were on her computer. I printed those off and figured out what went where, then sorted everything chronologically.
This morning I used my document feed scanner, the Fujitsu ScanSnap S1500M Instant PDF Sheet-Fed Scanner
, and created 6 pdf files of Mother's trips - 20 pages each. This scanner is awesome. I can't praise it enough. It's one of the best technical items I ever purchased.
Next I will send the pdf files to my family members who want copies. I am going to mail the printed copies (after I bind them as a book) to my mother's younger sister who is 92 years old. I know she'll enjoy reading them especially because she accompanied my mother on two of her many trips.
I plan on next copying mother's daily diaries that she kept when she was not on a trip. It feels good to finally bring some organization and preservation to these treasured family diaries.
![]() |
| Storage Boxes from pfile.com |
Since it looks like it will be 4 to 6 weeks before my items arrive, I went on to my next organizational project which was sorting my mother's trip diaries, scanning them and sharing them with other family members.
Let me explain first that my mother began going on small trips the year she retired at age 55. She always was an adventurer. At age 65 she took flying lessons, and built an ultra-light with her partner. Then just before her 80th birthday she decided she was going to embark on some adventures. Her first big trip was to Australia where she backpacked around with only a small Barbie Doll backpack she picked up at a local Wal-Mart store in Canada.
I compiled, as best I could, a list of her various trips and the years she took them. She usually travelled alone as she preferred not having to consult with anyone else about what to see and do each day. In her years of travel (her last trip was in 2001 at the age of 85) she visited many countries. I would not be surprised if the list below has some trips missing. She often impulsively took what she called "little trips" without telling any of her children!
![]() |
| Mother in Australia, 2001 |
1971: Age 55. Her first
trip was to Florida and California, making a side trip to Hawaii
1974: Arizona
1975: Maritime Provinces, Canada
1976: New Mexico, Europe (Holland, Germany, Switzerland, Italy)
1977: Texas
1978: Florida
1996: Australia & New Zealand (backpacking)
1997: Florida, Salt Lake City Utah, Ireland
1998: China
1998: New York
1999: Britain, Russia, Denmark, Sweden,
Finland, Poland, Germany
2000: Australia (camping on safari in the Outback)
2001: Age 85. Alaska & British Columbia, South Africa, Australia
My first step was to go through her hand-written journals and photocopy the pages. Since she wrote in small day-planners I then had to cut and paste to put several days on to one page. Then I photocopied those cut and paste pages.
Next I created "cover" sheets which gave the date and the name of the trip. Mother had also typed up notes (not the same as her diary entries) and these were on her computer. I printed those off and figured out what went where, then sorted everything chronologically.
![]() |
| Mother on a bull, year unknown |
This morning I used my document feed scanner, the Fujitsu ScanSnap S1500M Instant PDF Sheet-Fed Scanner
Next I will send the pdf files to my family members who want copies. I am going to mail the printed copies (after I bind them as a book) to my mother's younger sister who is 92 years old. I know she'll enjoy reading them especially because she accompanied my mother on two of her many trips.
I plan on next copying mother's daily diaries that she kept when she was not on a trip. It feels good to finally bring some organization and preservation to these treasured family diaries.
January 12, 2015
Organizing Family Photos - Creating a Plan
Today I decided the time has come to sort, scan and organize my physical photographs. I have thousands. Some are older family photos going back to 1900 from my mother, her sister, my aunt and my mother's cousin. Some are my family photos from when I was a child, and others are from my life since 1970.
I also have my personal collection of CDVs, Cabinet Cards, tintypes, ambrotypes and daguerreotypes. I estimated I have over 3,000 of those.
To start with I am concentrating on my family photos. You can see most of what I have in the photo on the left.
As you can see currently they are tossed into plastic tubs but I want to store them in archival quality boxes.
The first thing I did this morning was take a look to see what sizes of photographs I need to store. That allows me to determine the size of boxes I need and make an estimate as to how many will be required.
Then I started making my plan. First - I decided what my goal was for these photos - what is the final outcome I want? I know I want to eventually scan them all so I need one box for unscanned photos. Some have been scanned already and those are already sorted into tubs so that will be fairly quick to get into archival boxes when they arrive.
Any plan for organizing photos will depend on how you want to store them - by family groups? By time periods? By names of the person you are going to give them to? The choice is personal. I want to give some of mine to my adult children as soon as possible, others I want to keep for my grandchildren when they are older and some I want to hang on to myself.
I decided I needed 8 boxes to hold 4x6 photos, 1 box for 8x10 and 1 box for 11x14. With the 4x6 boxes I will have one box for photographs for each of my grown children, one for recent photographs I don't want to part with yet, one box for my life as a child growing up with my parents, one box for my maternal grandmother's family and one for my maternal grandfather's family.
When my boxes arrive I will sort the photos I have already scanned and get them put away. Scanning the photos not yet scanned will be something I do in bits and pieces over the coming months.
Next week I will create an organizational plan for my personal collection of mid 19th century photos and share that. I still have to create a plan for my digitized and scanned photos so I will work on that later this week and share it here on Olive Tree Genealogy blog.
I also have my personal collection of CDVs, Cabinet Cards, tintypes, ambrotypes and daguerreotypes. I estimated I have over 3,000 of those.
To start with I am concentrating on my family photos. You can see most of what I have in the photo on the left. As you can see currently they are tossed into plastic tubs but I want to store them in archival quality boxes.
Then I started making my plan. First - I decided what my goal was for these photos - what is the final outcome I want? I know I want to eventually scan them all so I need one box for unscanned photos. Some have been scanned already and those are already sorted into tubs so that will be fairly quick to get into archival boxes when they arrive.
Any plan for organizing photos will depend on how you want to store them - by family groups? By time periods? By names of the person you are going to give them to? The choice is personal. I want to give some of mine to my adult children as soon as possible, others I want to keep for my grandchildren when they are older and some I want to hang on to myself.
I decided I needed 8 boxes to hold 4x6 photos, 1 box for 8x10 and 1 box for 11x14. With the 4x6 boxes I will have one box for photographs for each of my grown children, one for recent photographs I don't want to part with yet, one box for my life as a child growing up with my parents, one box for my maternal grandmother's family and one for my maternal grandfather's family.
When my boxes arrive I will sort the photos I have already scanned and get them put away. Scanning the photos not yet scanned will be something I do in bits and pieces over the coming months.
Next week I will create an organizational plan for my personal collection of mid 19th century photos and share that. I still have to create a plan for my digitized and scanned photos so I will work on that later this week and share it here on Olive Tree Genealogy blog.
August 20, 2014
New Ebook: Organize Your Genealogy in Evernote in 10 Easy Steps
Organize Your Genealogy in Evernote in 10 Easy Steps
is now available on Amazon.com for only $1.25
This 22 page book is a step by step guide to using Evernote to organize your genealogy files in 10 easy steps.
You will learn how to create notes, how to set up notebooks, how to create stacks, the benefits of tags and how to set up a hierarchical structure for them, how to create virtual genealogy binders, how to merge Notes, easy ways to transfer your computer files into an Evernote Note, and more.
You will be able to follow each step to create your own Genealogy Notebooks full of your research (documents, photos, audio files, and more) on all your ancestors.
Following these 10 steps your Genealogy files will be organized, easily accessible and readily available to share with others if desired.
Please note that Kindle books can be read on any Kindle device, on iPhone, iPad, PC, Mac, Android device, BlackBerry, and Windows Phone 7, and through the Kindle Cloud Reader.
This 22 page book is a step by step guide to using Evernote to organize your genealogy files in 10 easy steps.
You will learn how to create notes, how to set up notebooks, how to create stacks, the benefits of tags and how to set up a hierarchical structure for them, how to create virtual genealogy binders, how to merge Notes, easy ways to transfer your computer files into an Evernote Note, and more.
You will be able to follow each step to create your own Genealogy Notebooks full of your research (documents, photos, audio files, and more) on all your ancestors.
Following these 10 steps your Genealogy files will be organized, easily accessible and readily available to share with others if desired.
Please note that Kindle books can be read on any Kindle device, on iPhone, iPad, PC, Mac, Android device, BlackBerry, and Windows Phone 7, and through the Kindle Cloud Reader.
July 17, 2014
Family Fun Days - Have You Had Yours?
Some of my blog readers might recall that every year I host a Family Fun Day (aka Family Reunion). Hubs and I create different games each year - some have a genealogy twist, some are Scavenger Hunts, others are races. If you're looking for game ideas and f you want to read about some of my former Family Fun Day ideas and activities, just click on Family Fun Day and Family Reunion
This year I decided to keep it simple. We built an in-ground pool last year for my physiotherapy water sessions, and it seemed obvious that most of our family and friends would enjoy just relaxing by the poolside. But just in case I set up 4 fun events, all based on old-fashioned games.
We had an Egg on a Spoon Race, Corn in Your Shoe Race, Froggy Hula Hoop Event and a good old-fashioned sack race. Of course there were prizes for the winning team.
I always draw quick sketches of each event showing the rules and how to play.
I like folks to mix it up and get to know other family members (each year I invite someone new that other family don't know) That means husbands and wives can't be partners during the games.
So this year I gave out Leis to everyone and the idea was that each person was to find whoever was wearing the matching lei and that would be their partner for the events.
The photos you see here were taken after the posters for each event sat out in the rain so forgive the worn appearance!
The key to a successful Family Fun Day is organization. So if you have not held one yet, be sure you plan it carefully. If you're like me you will need to make notes on what needs to be done. I covered my White Board in my kitchen with daily "to-do" lists starting on the Thursday before the big day.
Of course I also put out the Shutterfly books I created for our McGinnis family for everyone to look through.
I also have a plan for the day itself. Flexibility is built into it but it's important to think about timings - when will you eat, how far ahead will you set up buffet tables, when will you hold the games, when to serve coffee or tea, and so on.
Because I put family members to work I also create a timeline which I post on my white board or the fridge. It lists what needs doing throughout the day. That way if it gets hectic (as it always does!) I can simply ask people to help with a specific task and point them to the white board where they find details on what needs doing.
A quick diagram of where I want the events set up in our yards helps with organization when I ask my husband or son to get that set up with flags, ropes, traffic cones and whatever equipment is needed for each event. I just hand them my sketch, point to the tubs of equipment and they manage the rest without any input from me. You can see from my sketch that it isn't elaborate - it takes about 5 minutes or less to create.
So remember - organization and flexibility are the keys to a fun and successful Family Fun Day. Have you had yours this year?
This year I decided to keep it simple. We built an in-ground pool last year for my physiotherapy water sessions, and it seemed obvious that most of our family and friends would enjoy just relaxing by the poolside. But just in case I set up 4 fun events, all based on old-fashioned games.We had an Egg on a Spoon Race, Corn in Your Shoe Race, Froggy Hula Hoop Event and a good old-fashioned sack race. Of course there were prizes for the winning team.
I always draw quick sketches of each event showing the rules and how to play.
I like folks to mix it up and get to know other family members (each year I invite someone new that other family don't know) That means husbands and wives can't be partners during the games.So this year I gave out Leis to everyone and the idea was that each person was to find whoever was wearing the matching lei and that would be their partner for the events.
The photos you see here were taken after the posters for each event sat out in the rain so forgive the worn appearance!
The key to a successful Family Fun Day is organization. So if you have not held one yet, be sure you plan it carefully. If you're like me you will need to make notes on what needs to be done. I covered my White Board in my kitchen with daily "to-do" lists starting on the Thursday before the big day.
Of course I also put out the Shutterfly books I created for our McGinnis family for everyone to look through.
I also have a plan for the day itself. Flexibility is built into it but it's important to think about timings - when will you eat, how far ahead will you set up buffet tables, when will you hold the games, when to serve coffee or tea, and so on.
Because I put family members to work I also create a timeline which I post on my white board or the fridge. It lists what needs doing throughout the day. That way if it gets hectic (as it always does!) I can simply ask people to help with a specific task and point them to the white board where they find details on what needs doing.
A quick diagram of where I want the events set up in our yards helps with organization when I ask my husband or son to get that set up with flags, ropes, traffic cones and whatever equipment is needed for each event. I just hand them my sketch, point to the tubs of equipment and they manage the rest without any input from me. You can see from my sketch that it isn't elaborate - it takes about 5 minutes or less to create.
So remember - organization and flexibility are the keys to a fun and successful Family Fun Day. Have you had yours this year?
April 2, 2014
Using Evernote to Make Virtual Binders for Genealogy Organization
Last week Renee Zamora left a comment on my blog post Spring Is Supposedly Here and My Spring Organization Fever is High.
Renee mentioned that she is using Evernote to create binders in order to digitize all her paper files. I'm not sure I want to go totally digital for my genealogy but the idea of organizing my computer files using Evernote appealed to me. I use Evernote daily for gathering and organizing recipes, for saving receipts for items I purchase online, etc. But I'd never thought of pulling in files from my hard drive and organizing them into Notebooks.
I should preface this by saying that my computer files are a mess. I'm terrible at organizing them! My thousands of family photos, scanned documents and saved images from genealogy documents found online are a hodge-podge. Some are in the Documents folder on my laptop. Some are in the Pictures folder on my laptop. Some are on my desktop computer, some are on my Western Digital MyBookLive, some are on one of 3 Western Digital Passports, and some are in the Cloud - and more than one cloud! I use Dropbox, Bitcasa and Google Drive so depending on my mood that day I might put the 1851 Census for Levi Peer in any one of those spots.
You can see the problem I have when trying to find something specific. I know it's in one of those spots and I know it will be in a sub-directory of my Genealogy directory, but where?? Sure I can search for what I want but it's not always easy to find, and it's certainly time-consuming.
Using Evernote I'm able to pull each file in to a binder (Notebook) that I've created. I can see at a glance what I've got on each ancestor and even better, I can click on the item in Evernote, choose to view it in Picassa or Preview or whatever program I want, and then I can easily move or copy it to the proper directory on my hard drive. Killing two birds with one stone! I am making it easier to see my saved files and am able to organize my hard drive at the same time.
The first thing I did was create a Notebook (I'm calling Notebooks "Binders" in this blog post) called "Genealogy Binders". Then I created separate Notebooks (Binders) under this main Binder. My individual Binders are set up to suit me, so I have one Binder for each direct ancestor. I am also making individual Binders for documents and photos I have for siblings of my direct ancestors. Each of these individual binders goes into what Evernote calls a "stack". Think of a stack like the folders and sub-folders on your hard drive. You can see my setup for this in the image on the right. By the way I'm nowhere near done with setting up my binders!
Then I opened a binder and began creating individual notes within that specific binder. For example, I opened Peer Gen 1 Stephen - Mary Elizabeth Vollick. I click on "New Note". Then I go to the drop down menu called FILE and choose ATTACH FILES. I am then able to search for and insert an image or document from my hard drive. You can see the marriage registration I put into a note inside the Stephen Peer & Mary Vollick binder. The other notes I've added are on the left sidebar. I can also view these notes in different ways if I don't like the sidebar view.
Once I have all the notes I want in a binder, I can do lots of different things. I haven't finish playing around with all the choices but one I really like is creating a Table of Contents for a binder.
All I have to do is select all the notes in a binder. Evernote lays them all out for me in a pile and then I choose Create a Table of Contents and it's done. The TOC displays as a new note in that binder. Update: Apparently creating a TOC is only available for MAC users. Sorry to all you Windows users out there!
I like that the list of contents in the TOC are linked to the individual note so I can click on any one I want and immediately view it full-size. I also chose to give each of my notes a title that began with a year because then I was able to sort the notes in chronological order. This helps me see at a glance what I have as a timeline for each ancestor and what I'm missing.
This is as far as I've gone in discovering how to set up and organize my genealogy files as virtual binders in Evernote but I am loving it! Once I have everything organized as I want, I'll decide what my next step is. I already shared one binder with a family member (easy to do from the Evernote program) and I'm going to check out my other options at some point.
Renee mentioned that she is using Evernote to create binders in order to digitize all her paper files. I'm not sure I want to go totally digital for my genealogy but the idea of organizing my computer files using Evernote appealed to me. I use Evernote daily for gathering and organizing recipes, for saving receipts for items I purchase online, etc. But I'd never thought of pulling in files from my hard drive and organizing them into Notebooks.
I should preface this by saying that my computer files are a mess. I'm terrible at organizing them! My thousands of family photos, scanned documents and saved images from genealogy documents found online are a hodge-podge. Some are in the Documents folder on my laptop. Some are in the Pictures folder on my laptop. Some are on my desktop computer, some are on my Western Digital MyBookLive, some are on one of 3 Western Digital Passports, and some are in the Cloud - and more than one cloud! I use Dropbox, Bitcasa and Google Drive so depending on my mood that day I might put the 1851 Census for Levi Peer in any one of those spots.
You can see the problem I have when trying to find something specific. I know it's in one of those spots and I know it will be in a sub-directory of my Genealogy directory, but where?? Sure I can search for what I want but it's not always easy to find, and it's certainly time-consuming.
Using Evernote I'm able to pull each file in to a binder (Notebook) that I've created. I can see at a glance what I've got on each ancestor and even better, I can click on the item in Evernote, choose to view it in Picassa or Preview or whatever program I want, and then I can easily move or copy it to the proper directory on my hard drive. Killing two birds with one stone! I am making it easier to see my saved files and am able to organize my hard drive at the same time.
![]() |
| My Genealogy "Binders" on Evernote |
Then I opened a binder and began creating individual notes within that specific binder. For example, I opened Peer Gen 1 Stephen - Mary Elizabeth Vollick. I click on "New Note". Then I go to the drop down menu called FILE and choose ATTACH FILES. I am then able to search for and insert an image or document from my hard drive. You can see the marriage registration I put into a note inside the Stephen Peer & Mary Vollick binder. The other notes I've added are on the left sidebar. I can also view these notes in different ways if I don't like the sidebar view.
![]() |
| Creating a Table of Contents for one "Binder" |
All I have to do is select all the notes in a binder. Evernote lays them all out for me in a pile and then I choose Create a Table of Contents and it's done. The TOC displays as a new note in that binder. Update: Apparently creating a TOC is only available for MAC users. Sorry to all you Windows users out there!
![]() |
| Table of Contents for One Binder |
This is as far as I've gone in discovering how to set up and organize my genealogy files as virtual binders in Evernote but I am loving it! Once I have everything organized as I want, I'll decide what my next step is. I already shared one binder with a family member (easy to do from the Evernote program) and I'm going to check out my other options at some point.
March 26, 2014
Spring Is Supposedly Here and My Spring Organization Fever is High
Supposedly Spring is here. I don't know about you but we have about 3 to 4 feet of snow still on the ground and yesterday we had a blizzard. Mother Nature's being very cruel this year. But the good thing about Spring is that suddenly I'm hit with a burst of energy and a strong desire to ORGANIZE!
Yep, every year I go through this. During the long winters I sit and think about the mess of my genealogy files. Every year I come up with a new way to organize them. Sometimes I go back to old ways, long discarded as not working. I've tried binders by surnames, binders by topics, pdf files on my computer, file folders by surname, file folders by topics... in short I believe I've tried every possible organizational method there is. In fact I've blogged about getting organized many times.
But I'm never happy. These past couple of years I've discovered quite a bit of detail (newspaper clippings, parish and church records, land petitions and so on) for several of my ancestors. I've also scanned many original documents in my possession. That's what made me realize my genealogy is getting out of hand. I'm overwhelmed by the sheer volume of my findings.
Hubs is in the same boat. He doesn't even remember who many of his further back ancestors are or what we know about them. So today we made a decision that starting this week we are going to set aside a minimum of one hour every day to sort, print and organize our genealogy files.
I'm going back to one of my very first methods that I used many years ago - binders. These binders will only be for my direct lines. However I'm not going to print genealogy reports or notes for my ancestors. Instead I plan to print a family group sheet for each of my direct ancestors. then print copies of all the documents I have for the parents on the family group sheet.
I suspect I will end up with many binders - each one holding ancestors sharing one surname for all generations. Ancestors whose data is skimpy will share a binder with other less detailed ancestors. I'm not going to put all the siblings in these binders. I have them on my genealogy program and in my paper files and in my digital files so that will suffice for now.
For me it's about narrowing my focus, not expanding it! I tend to get carried away and research all siblings of every direct ancestor. Don't get me wrong, that is a very valuable research technique as it provides you with clues and information you may not find if you only research your direct. But I don't need to organize all those siblings into a binder.
So wish us luck! I have no idea how many weeks or months this will take but I'm excited about starting.
Yep, every year I go through this. During the long winters I sit and think about the mess of my genealogy files. Every year I come up with a new way to organize them. Sometimes I go back to old ways, long discarded as not working. I've tried binders by surnames, binders by topics, pdf files on my computer, file folders by surname, file folders by topics... in short I believe I've tried every possible organizational method there is. In fact I've blogged about getting organized many times.
But I'm never happy. These past couple of years I've discovered quite a bit of detail (newspaper clippings, parish and church records, land petitions and so on) for several of my ancestors. I've also scanned many original documents in my possession. That's what made me realize my genealogy is getting out of hand. I'm overwhelmed by the sheer volume of my findings.
Hubs is in the same boat. He doesn't even remember who many of his further back ancestors are or what we know about them. So today we made a decision that starting this week we are going to set aside a minimum of one hour every day to sort, print and organize our genealogy files.
I'm going back to one of my very first methods that I used many years ago - binders. These binders will only be for my direct lines. However I'm not going to print genealogy reports or notes for my ancestors. Instead I plan to print a family group sheet for each of my direct ancestors. then print copies of all the documents I have for the parents on the family group sheet.
I suspect I will end up with many binders - each one holding ancestors sharing one surname for all generations. Ancestors whose data is skimpy will share a binder with other less detailed ancestors. I'm not going to put all the siblings in these binders. I have them on my genealogy program and in my paper files and in my digital files so that will suffice for now.
For me it's about narrowing my focus, not expanding it! I tend to get carried away and research all siblings of every direct ancestor. Don't get me wrong, that is a very valuable research technique as it provides you with clues and information you may not find if you only research your direct. But I don't need to organize all those siblings into a binder.
So wish us luck! I have no idea how many weeks or months this will take but I'm excited about starting.
October 9, 2012
Pinterest: Time Waster or Useful Utility?
"What is Pinterest? Why would I want to join? Isn't it just another time-waster?"
These are questions I see being asked constantly about Pinterest. I'm a Pinterest user. I like it. You can find me there under my Twitter handle LorineMS or by searching for Olive Tree Genealogy.
Here's what the Pinterest site has to say about what Pinterest is for:
Once registered on Pinterest you simply create Boards and then you start pinning websites on your boards. I started off very simply by creating a Board for Genealogy Websites, Cooking, Technology and Antiques.
As I filled those boards with my pins, I realized I needed to divide them into more precise categories such as Breakfasts, Slow Cooker Recipes, Veggies to Die For, and so on. You can get as creative or plain as you want with your Board titles! Pinterest makes it easy to move your pins around if you find you want to create new boards with more specific topics.
I use Pinterest to capture recipes that I don't have time to look through carefully. Because when I know I'm going to try a recipe I capture it on Evernote. But if I'm busy but I don't want to read through the recipe and think about whether or not I want to make it, Pinterest is the option I choose to save or bookmark it.
I also use Pinterest to organize my favourite genealogy websites. All I need to do is "pin" a website that I like. I do this by downloading the Pin It Button which I then can see on my Firefox browser. That means whenever I find a webpage I like (genealogy, cooking, technology, antiques, etc) I simply click on the button. Then I'm offered a choice of available photos from the webpage. I choose one and the photo plus the original site's URL are pinned to whatever board I choose.
Pinterest is very easy to use. There are drop down menus which allow you to quickly and easily create boards, move your pins from one board to another, reorganize the order of your boards on your Pinterest page, and so on.
Pinterest is also a social tool - you are meant to follow other people's boards and have them follow yours. I like following specific boards rather than every board one person has on their page. So I mainly follow genealogy and cooking boards that appeal to me.
Following other boards allows you to spot a yummy recipe or cool new genealogy website that you didn't know about. Then you repin it to your board of choice and you've got an automatic bookmark/reminder of that site.
There's a couple of drawbacks to Pinterest. You can't pin from Facebook. There may be other sites that are not Pinterest friendly. Some sites don't have any graphics that Pinterest recognizes so that blocks pinning unless you use a workaround I figured out.
Here's what you do if you want to pin a specific webpage but the graphics are not recognized by Pinterest. Copy the URL of the webpage you want to pin (highlight the URL and copy with your mouse). Now poke around in the site until you find a graphic that Pinterest can use.
Never mind if it's not the right URL to lead others to the page you want. Right now you just want the graphic. Pin that to your board. Now go in and EDIT that pin. You'll see a field where you can change the URL. This is where you will PASTE the URL you copied previously. Bingo you've got the graphic you want and the correct URL to take viewers directly the appropriate page.
So come and join me on Pinterest! It's fun, it's easy and it's such a cool way to organize your favourite sites in a visual way.
These are questions I see being asked constantly about Pinterest. I'm a Pinterest user. I like it. You can find me there under my Twitter handle LorineMS or by searching for Olive Tree Genealogy.
Here's what the Pinterest site has to say about what Pinterest is for:
Pinterest is a Virtual Pinboard.
Pinterest lets you organize and share all the beautiful things you find on the web. People use pinboards to plan their weddings, decorate their homes, and organize their favorite recipes.
Best of all, you can browse pinboards created by other people. Browsing pinboards is a fun way to discover new things and get inspiration from people who share your interests.
| Some of my Pinterest Boards |
| More of my Pinterest Boards |
| One of my many cooking boards |
| My Genealogy Board of Fav Websites |
![]() |
| Drop Down Menu with Pin It Button |
Pinterest is also a social tool - you are meant to follow other people's boards and have them follow yours. I like following specific boards rather than every board one person has on their page. So I mainly follow genealogy and cooking boards that appeal to me.
Following other boards allows you to spot a yummy recipe or cool new genealogy website that you didn't know about. Then you repin it to your board of choice and you've got an automatic bookmark/reminder of that site.
There's a couple of drawbacks to Pinterest. You can't pin from Facebook. There may be other sites that are not Pinterest friendly. Some sites don't have any graphics that Pinterest recognizes so that blocks pinning unless you use a workaround I figured out.
Here's what you do if you want to pin a specific webpage but the graphics are not recognized by Pinterest. Copy the URL of the webpage you want to pin (highlight the URL and copy with your mouse). Now poke around in the site until you find a graphic that Pinterest can use.
| You can edit URLs in EDIT PIN mode |
So come and join me on Pinterest! It's fun, it's easy and it's such a cool way to organize your favourite sites in a visual way.
Subscribe to:
Posts (Atom)