

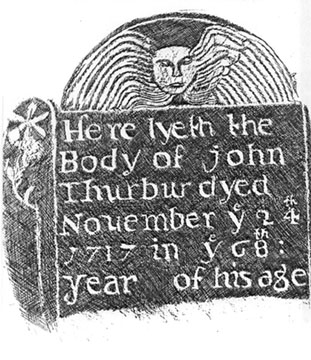
 While wandering around the Cemetery the day before my parents' Memorial Service last weekend, I was quite struck by the many artistic and ornate tombstones I saw. Many are quite beautiful, ornate carvings with delicate lines and images.
 It struck me that tombstone rubbings are not often seen, yet they are a beautiful and fun way to preserve an old tombstone and to memorialize an individual. Tombstone rubbings allow you to create artwork for your home and to encourage children or grandchildren to take an interest in genealogy.
Since my two eldest grandchildren (9 and 11) are coming in a few months for their annual holiday on Grandma and Grandpa's farm, I need a new genealogy project for them. In past years I have done a Cemetery Hunt, created Ancestor Cards and Genealogy Crossword Puzzles.
This year not only are we going to create a Genealogy Time Capsule, but I have decided I am going to incorporate Tombstone Rubbings!
You need:
White paper (Rice paper or plain white paper such as butcher's paper)
Rubbing wax, charcoal or large black crayon
Soft brush
Water
Masking tape
Scissors
 The first thing to do is to gently and carefully clean the tombstone you have chosen. Don't use harsh cleaning materials or soap, just a bit of water and your soft brush. You want to remove any bird droppings, moss, etc if possible. But be careful to not damage the stone in any way.
If you use water to wash off the stone you will have to wait until it is thoroughly dry before taking the next step. Now you need to cut your paper so that it is the right size to cover the tombstone. Tape it securely to the stone so that it doesn't slip. I like to go around the sides quite far and tape the paper there. This will help you get a good non-blurred image as you rub.
 Take your rubbing wax or crayon and start rubbing around the edges of the tombstone. Start lightly, as you can always go back and darken the rubbing later. When the edges are done, move to the central part of the stone. It's a personal choice as to how dark or how light you want the rubbing to be.
 When you are satisfied with your rubbing, carefully remove the masking tape from the edges, roll the rubbing up (gently!) and take it home to frame or hang on your wall as is. If you used charcoal you should spray your rubbing with hair spray to help set the charcoal before you roll it up.
Please be respectful of any tombstone you are doing a rubbing on. Do not take any chances on damaging a stone, and remember that someone's loved one lies beneath it.
This will be a fun activity to do with my grandchildren and I have an idea for incorporating it into yet another Genealogy Activity with them! More on that tomorrow.....
3 comments:
Although the kits are popular the majority of cemeteries I have contacted in British Columbia will not allow tombstone rubbings. As well, many in Yorkshire and County Durham forbid the practice. If you are going to consider this venture make sure you ask and receive permission of the cemetery.
Patricia, thank you for the headsup on this! I had no idea that tombstone rubbings were not allowed in some (many?) cemeteries. I will mention this in my post tomorrow as I am going to discuss something similar.
Also, I've read where the adhesive in tape can cause damage - first by potentially pulling off a bit of the stone and second by causing discoloration over time like tape and Post-Its do to books.
I suggest that in a cemetery that will allow you to rub, that your paper is large enough or that you use an extra backer sheet so that you completely wrap the stone in the paper and tape exclusively to this to prevent damage to the headstone.
Some beautiful and special works on paper can be made with rubbings. The college I attended had a collection of rubbings from the sarcophagi of old English knights. I'd prefer one of a GGGGGGGGGranny!
Post a Comment